Light switches are necessary additions to any domestic or commercial space. And when you want to update your lighting, or embrace a new aesthetic, a switch upgrade can make all the difference.
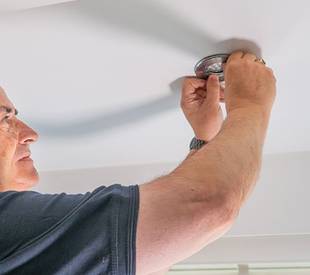
The NICEIC strongly recommends that all electrical work is carried out by a qualified electrician. If you decide to undertake electrical work yourself, you should only do so if you are competent, have the necessary knowledge and skills, and can work safely in accordance with current regulations. The following information may help you plan and carry out the work safely.

Here to Help
24/7 domestic and commercial electrical services you can trust.
Get a Free No Obligation QuoteSafety first for any electrical work
You should never take risks with electrical safety. All electric work should be carried out by a competent person and in accordance with any local Building Regulations. In England and Wales, some electrical work must comply with Part P of the Building Regulations.
If you’re unsure about carrying out any electric work or upgrades, call a qualified electrician before attempting anything yourself.
Similarly, if the wiring insulation appears damaged, brittle, scorched or deteriorated, stop work and contact a qualified electrician.
For more information on when to consult a professional, check out our blog, ‘DIY or Call an Electrician? When to Leave It to the Experts’.
If you feel prepared to carry out electrical work yourself, here’s some safety precautions to take care of first:
- Switch off the mains power at the consumer unit or fuse box. Isolate the circuit you plan to work on by switching off the correct breaker or removing the fuse where applicable.
- Alternatively, switch off the breaker and lock it if you can.
- Attach a note to the unit or notify those with access; to let them know you’re working on the circuit.
- Confirm the circuit is dead and safe to work on using a two-pole voltage tester or an approved voltage testing device. Test the tester on a known live source before and after use to confirm it is working correctly.
- Keep your voltage tester nearby so you can re-check the circuit if needed before restoring power.
Extra caution is needed when dealing with multi-way switches. In two-way or multi-way lighting circuits, all switches should normally be supplied from the same circuit.
Incorrect wiring can leave some conductors live even when one breaker is switched off.
Not all multi-way light circuits look the same, and this doesn’t mean they’re not safe - but extra care should be taken!
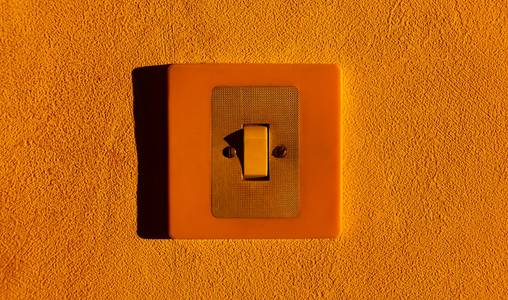
Types of light switches
Wall-mounted light switch fittings, or ‘plate switches’, can have one or more switches, called ‘gangs’.
A one-way switch is a basic on-off switch that controls one light or circuit in a single location. These are used in smaller rooms, cupboards and spaces with a single-entry point.
There are also options that offer two-way and multi-way switching. This means you can control lights using multiple switches, which is particularly useful in high-traffic areas, like hallways.
From easy-care plastic to sleek metal, there’s a huge variety of fittings available, including:
Rocker switches
These switches see-saw between on and off. Rockers are probably the most familiar looking light switch.
Dimmer switches
Made for flexible lighting, dimmers allow you to adjust the brightness of the lights in your home.
Toggle switches
Instead of a rocking mechanism, these switches are operated by small levers that are pushed up or down to control the lights.
Architrave switches
When space is tight, architrave switches are narrow and unobtrusive. They slot nicely into small spaces, like door frames.
Pull cord switches
Pull cord switches are commonly used in bathrooms and shower rooms because they help reduce the risk of contact with electrical fittings in wet areas.
Some modern lighting systems, dimmers and smart switches may require additional wiring or a neutral conductor at the switch position. Always check the manufacturer’s instructions before installation.
Your Local Electrical Specialists
We fix, install, and inspect your electrics without fuss.
Book Your Electrical Check TodayPreparing for the electrical job
Replacing a like-for-like light switch can be a manageable DIY task for competent homeowners, provided proper safety precautions are followed.
Tips to remember:
- It’s a good idea to make a note of how the old switch was wired before you disconnect it, as the new switch will need to be wired in the same way. Taking a clear photo before disconnecting any wires can also help when reconnecting the new switch.
- As you’re removing the old switch, keep a hold of the original screws in case you need to re-use them.
- The colour of your wires may differ depending on the age of the switch. For the UK:
- Live wires are now brown; they used to be red.
- Neutral wires are now blue; they used to be black.
- Earth wires have a green and yellow sleeving. In older installations, they may be solid green or bare copper with sleeving added.
Locating and identifying earth wires
Call a professional electrician if you cannot identify a green / yellow wire, known as the earth wire.
Should there be a fault in your installation, the earth wire conducts electricity to the ground, instead of through your body. Not having one properly connected could be fatal.
If you had a plastic switch and mounting box, the earth wire may not have needed to be connected to a terminal. But when dealing with chrome or metal switches the earth wire is vital.
How to replace a one-way light switch
- Isolate the circuit and confirm the power is off with a voltage tester.
- Unscrew the switch faceplate and pull it forward so the connections behind are visible. Draw a diagram, or take a photograph, showing how the wires are attached to the terminal, so you’ll remember for later.
- Release the terminal screws and pull the wires (cores) from the terminals. If the earth core is properly insulated in green/yellow sleeving and connected to the mounting box, leave this attached.
- Connect the cores to the correct terminals of the new switch and tighten the screws.
- Check the cable cores are clamped firmly by giving the wires a slight tug.
- Ensure all earth conductors remain correctly connected. Metal switches must be properly earthed.
- Carefully fold the wires back into the box and secure the switch faceplate firmly to the wall.
- Reset the fuse or flick the circuit breaker back on and test your new light.
Final thoughts
While we always recommend that all electrical work be undertaken by a fully qualified electrician, if you do intend to carry-out any smaller jobs yourself you should be competent, confident and always follow safety advice.
If you’re ever unsure when dealing with electrics, it’s best to contact a professional electrician to avoid serious accidents. If you need guidance on an electrical upgrade, contact our friendly team on 0330 108 4111.


